


“Here to Help” is a support column written especially for Formstack’s awesome, loyal customers. Getting people to complete and submit your online forms is always the goal. But the communications that happen after a form is submitted are just as important. That’s why Formstack gives you the ability to send two types of emails upon form submission: Notification Emails and Confirmation Emails.A Notification Email is an internal email meant to inform necessary departments or team members of a form submission and/or deliver the submitted data (or a link to the submitted data). These emails are set up automatically for each of your forms.A Confirmation Email is an external email meant to inform the submitter of a successful submission, thank the submitter for completing the form, and/or provide the submitter with a copy of his or her fom responses. These emails are not included on your forms by default, so you have to add them manually.To customize either type of email, simply navigate to Settings > Emails & Redirects, and select the appropriate action under “Notification Emails” or “Confirmation Emails” (e.g., If you want to update the information in the default Notification Email, select the “Notification Email” text to make edits.).

Setting up custom in-app emails is a great way to personalize your form communications. Here are a few tips to help you create customized Notification and Confirmation Emails in your Formstack account:
#1: Personalize Emails with Field Variables
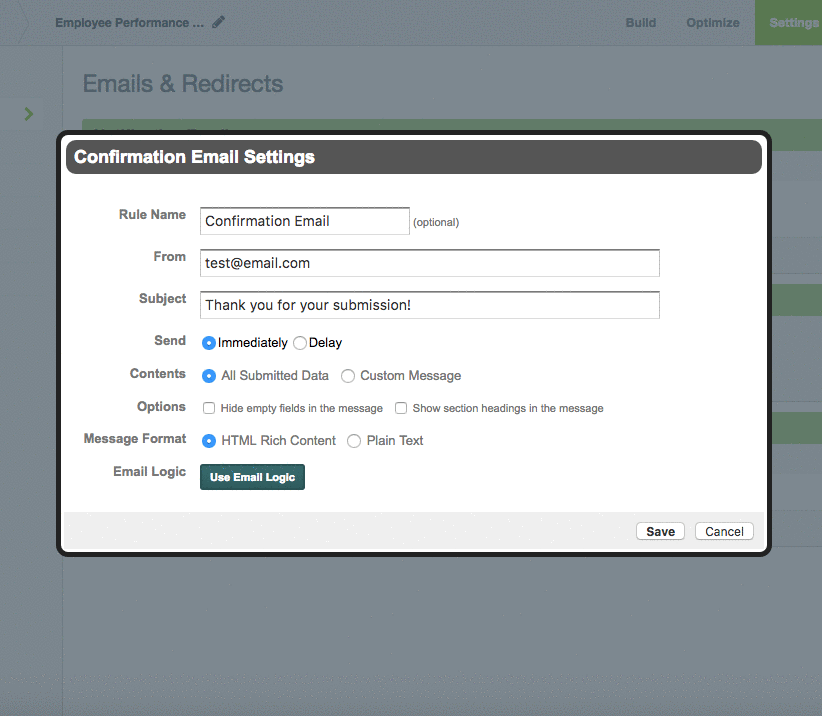
One way to customize the emails you send after a form is submitted is through use of form field variables. Formstack allows you to grab information from the form submission (such as a submitter’s name) and use it to personalize your emails.Whether you’re looking to personalize a Notification Email or a Confirmation Email, the steps are the same. First, navigate to Settings > Emails & Redirects and click the appropriate link under “Notification Emails” or “Confirmation Emails” to open the associated email settings. Then, follow these steps:
- In the “Contents” section, select the radio button next to “Custom Message.”
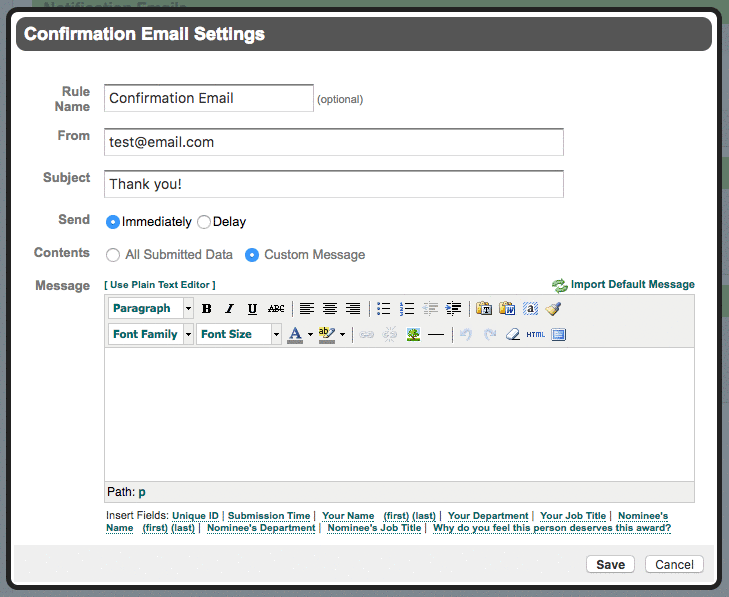
- Type your custom message into the text editor.
- Click the links below the text editor (where it says “Insert Fields”) to include specific field information in your custom message. For example, if you want to address a submitter directly in a Confirmation Email, include the Name field variable in your custom message. Whatever the submitter types into the Name field will then show up in the Confirmation Email.
Here are the above steps in action:
Note: You can also insert field variables into the subject line of your emails by copying the appropriate variables from the body of your email and pasting them into the subject line.
#2: Use Email Logic to Trigger Unique Emails
Another way to customize your Notification and Confirmation Emails is through use of Email Logic. This Formstack feature allows you to direct Notification Emails to specific recipients and/or trigger unique Confirmation Emails based on form responses.To use Email Logic, your form must contain one of the following fields: Dropdown List, Radio Button, Checkbox, or Number.To add Email Logic to a Notification Email so specific team members will be notified when a submission is received, follow these steps:
- Open the Notification Email Settings box by navigating to Settings > Emails & Redirects > Notification Emails.
- Click the “Use Email Logic” button at the bottom.
- Set your desired logic rules. (Note: To add more than one logic rule, you can click the green plus sign on the right.)
- Insert the appropriate email address(s) into the “Email To” box.
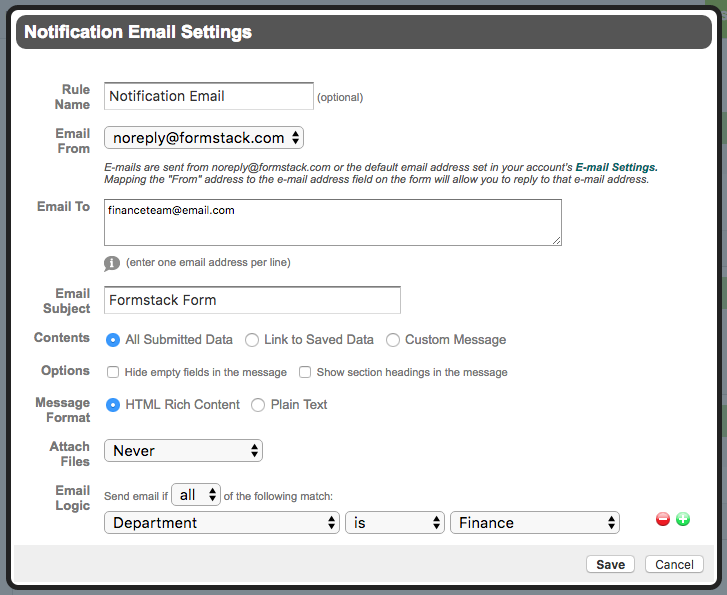
In the example above, logic has been set so that the finance team will receive a Notification Email whenever a submitter selects “Finance” for “Department.”To add Email Logic to a Confirmation Email so submitters will receive specific and relevant responses and information, follow these steps:
- Open the Confirmation Email Settings box by navigating to Settings > Emails & Redirects > Confirmation Emails.
- Click the “Use Email Logic” button at the bottom.
- Set your desired logic rules. (Note: As with Notification Emails, you can add more than one logic rule by clicking the green plus sign on the right.)
- Select “Custom Message” in the Contents section.
- Type a message in the text editor that is relevant to the logic you set.
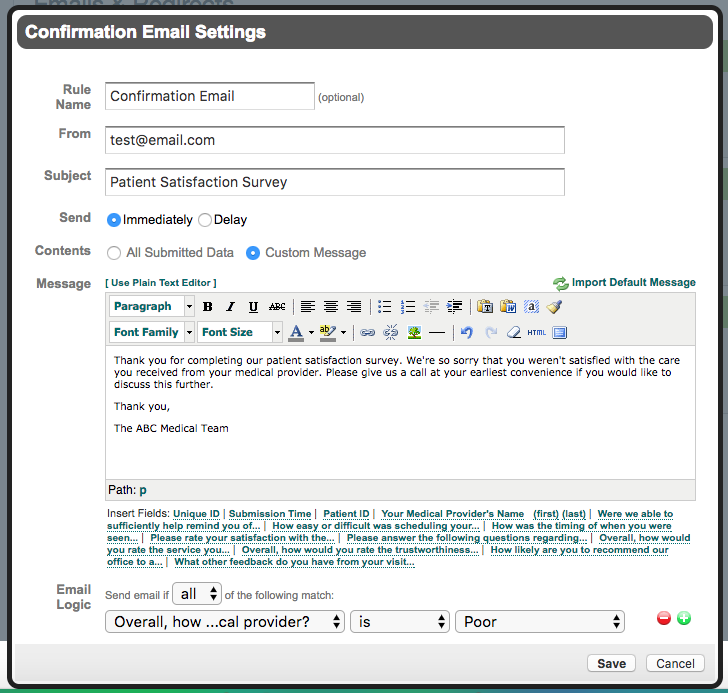
In the example above, logic has been set so that an apologetic Confirmation Email will be sent to any patients who complete the patient satisfaction survey and indicate they received poor service.
#3: Insert Images into Emails
One final way to customize your Notification and Confirmation Emails is to include images in the messages. Using a static image or gif in your Confirmation Email can be a fun way to thank users for their submission.To insert an image into a Notification or Confirmation Email, simply open the appropriate email settings (as described previously) and select “Custom Message.” Then, follow these steps:
- Click the “Insert/Edit Image” icon in the text editor menu (it looks like a tree).
- When the options box pops up, select the “Upload” tab, then click “Choose File.”
- Browse for the correct image file, then click “Upload Image.”
- When you see a message that indicates your file has been uploaded successfully, click “OK.”
- Open the “Image List” dropdown, and select your image.
- Set the appropriate dimensions, alignment, etc., then choose “Insert.”
Here are the above steps in action:
Note: Formstack’s email sender will only send up to 14 MB of data per form. Thus, it’s important to make sure the images you include are less than 14 MB. If the images and other data in your email are over 14 MB, you may experience issues with email delivery.
Setting up and customizing Notification and Confirmation Emails is a great way to enhance the user experience on your online forms. But that’s not all you can do! If you want to learn more about personalizing the user experience after someone hits “Submit,” click below.

